Achieving a flawless ceiling texture requires the right joint compound tailored to your specific needs. In this comprehensive guide, we explore the top contenders for the title of the best joint compound for ceiling texture. Selecting the ideal product is crucial for a seamless finish, whether you are a seasoned professional or a DIY enthusiast. Join us as we delve into the features, benefits, and customer reviews to help you make an informed decision for your next project.
We’ll cover the best joint compound for ceiling texture reviews later in this article. Meanwhile, check out these related products on Amazon:

Last update on 2026-02-08 at 02:58 / Paid links / Images from Amazon Product Advertising API
Understanding Joint Compound For Ceiling Texture
Joint compound is a versatile material commonly used in the construction industry for finishing drywall seams and repairing walls and ceilings. When it comes to adding texture to ceilings, joint compound can also be used to create a variety of decorative finishes. Texturing a ceiling with joint compound can help add visual interest, hide imperfections, and create a unique design element in a room.
There are several different techniques that can be used to apply joint compound for ceiling texture, each resulting in a distinct look. Popular methods include skip trowel, orange peel, knockdown, and popcorn ceiling textures. These textures can range from subtle and smooth to more pronounced and dramatic, depending on the desired aesthetic.
To achieve a textured ceiling using joint compound, the material is typically thinned out with water to a consistency that is easy to work with. It is then applied to the ceiling surface with a trowel, roller, or sprayer, depending on the chosen texture technique. After the compound has been applied, it is often further manipulated with tools to create the desired texture effect before it dries.
Overall, joint compound offers a cost-effective and customizable solution for adding texture to ceilings. With the right techniques and tools, homeowners and professionals can achieve a variety of textured finishes using joint compound to enhance the look and feel of a room.
Best Joint Compound For Ceiling Texture
01. Sheetrock Plus 3 Lightweight Joint Compound
The Sheetrock Plus 3 Lightweight Joint Compound is a game-changer for anyone tackling drywall projects. Its lightweight formula makes for easy application and smooth results, saving time and effort during the finishing process. The compound’s superior adhesion and low shrinkage properties ensure a professional-looking finish that lasts.
Whether you’re a DIY enthusiast or a professional contractor, this joint compound is a must-have in your arsenal. Its easy sanding capabilities and quick drying time make it a versatile and efficient choice for repairing cracks, filling holes, or finishing seams. Say goodbye to uneven surfaces and hello to a flawless end result with Sheetrock Plus 3 Lightweight Joint Compound.
Pros
- Easy to sand
- Lightweight formula
- Low shrinkage
- Smooth application
- Extended working time
- Excellent bonding properties
Cons
- Longer drying time compared to other quick-setting joint compounds.
- May exhibit shrinkage or cracking if applied too thickly.
02. USG Sheetrock All Purpose Joint Compound
With its smooth consistency and easy application, the USG Sheetrock All Purpose Joint Compound is a reliable choice for professional contractors and DIY enthusiasts alike. This versatile compound dries quickly and sands easily, making it perfect for filling gaps, embedding tape, and finishing drywall joints in one go. Its low shrinkage formula ensures a seamless finish, reducing the need for additional coats.
Whether you’re tackling small repairs or large renovation projects, this joint compound offers superb adhesion and workability. Users appreciate its minimal odor and long-lasting durability, making it a top pick for achieving professional-quality results with ease and efficiency.
Pros
- Versatile for various drywall finishing tasks.
- Easy to sand for a smooth finish.
- Adheres well to a variety of surfaces.
- Dries quickly, reducing project completion time.
- Low shrinkage for minimal crack formation.
Cons
- Extended drying time compared to other joint compounds.
- May require multiple coats for a smooth finish on certain surfaces.
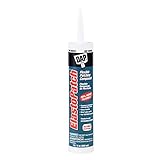
03. DAP Presto Patch Joint Compound
Ideal for DIY projects, the DAP Presto Patch Joint Compound is a game-changer in home repair. With its easy application and fast drying time, fixing cracks and holes has never been simpler. The lightweight formula ensures smooth results, making it perfect for both beginners and experienced handymen.
Whether you are a novice or a pro, this joint compound will exceed your expectations. Its ability to seamlessly blend with various surfaces and its durable finish make it a top choice for any patching job. Say goodbye to uneven walls and hello to a flawless finish with the DAP Presto Patch Joint Compound.
Pros
- Quick drying time
- Easy to apply and sand
- Smooth and even finish
- Suitable for both small and large repairs
- Can be painted over seamlessly
Cons
- Limited coverage area per container.
- Longer drying time compared to other joint compounds.
- May require multiple applications for smooth finish.
04. Gold Bond ProForm Lite Joint Compound
Gold Bond ProForm Lite Joint Compound is a game-changer for DIY enthusiasts and professionals alike. Its lightweight formula is easy to work with, providing smooth and bubble-free application. The quick drying time allows for faster project completion without compromising quality.
This joint compound’s excellent adhesion and minimal shrinkage make it ideal for filling and finishing drywall seams and corners. The low VOC content ensures a safer indoor environment. Overall, Gold Bond ProForm Lite Joint Compound is a reliable choice for achieving professional results on your drywall projects.
Pros
- Lightweight formula
- Easy to sand
- Low shrinkage
- Smooth finish
- Quick drying time
- Excellent adhesion
Cons
- Longer drying time compared to some other joint compounds.
- May require multiple coats for a smooth finish.
05. Strait-Flex Tuff-Flex Joint Compound
Strait-Flex Tuff-Flex Joint Compound truly sets itself apart in quality and ease of use. The smooth consistency and excellent adhesion make it ideal for both professionals and DIY enthusiasts. Its quick drying time allows for efficient project completion, while the strong bond ensures durable results.
With its innovative formula, Tuff-Flex delivers seamless finishes and minimizes shrinkage risks. This versatile joint compound tackles various surfaces with precision, leaving a polished look every time. Say goodbye to cracks and imperfections – Strait-Flex Tuff-Flex Joint Compound is a game-changer in the world of drywall finishing.
Pros
- Seamless and smooth finish
- Crack resistant
- Easy to sand
- Excellent adhesion
- Versatile application
Cons
- Limited availability in some areas
- May require additional coats for optimal results
Benefits of Using Joint Compound for Ceiling Texture
When it comes to achieving a flawless ceiling texture, purchasing the best joint compound for ceiling texture is essential. Joint compound, also known as drywall mud, is a versatile material used to finish seams and cover imperfections in walls and ceilings. The right joint compound can make a significant difference in the overall look and durability of a ceiling texture.
One primary reason people need to buy joint compound for ceiling texture is its ability to provide a smooth and even surface for painting or texturing. The compound fills in gaps and joints, creating a seamless finish that enhances the aesthetics of the ceiling. Additionally, joint compound is crucial for concealing any blemishes or uneven areas on the ceiling, resulting in a professional and polished appearance.
Moreover, using high-quality joint compound ensures better adhesion of the texture material to the ceiling, preventing it from peeling or cracking over time. The compound acts as a secure base, allowing for a more durable and long-lasting texture application. Investing in the best joint compound for ceiling texture can ultimately save time and money by reducing the need for frequent repairs or touch-ups.
In conclusion, the purchase of joint compound for ceiling texture is a wise decision for anyone looking to achieve a flawless and enduring finish. By selecting the best joint compound suited for the specific texture application, individuals can ensure a beautiful and seamless result that enhances the overall look of their living or working space.
Choosing the Right Joint Compound for Your Ceiling Texture Needs
Selecting the ideal joint compound for your ceiling texture is crucial for achieving a flawless finish. Factors such as drying time, ease of application, consistency, and compatibility with various textures play a significant role in determining the best option for your project. By considering these key elements, you can ensure a seamless and professional result for your ceiling texture needs.
Type Of Texture Desired
When choosing joint compound for ceiling texture, it is essential to consider the type of texture desired. Different textures, such as popcorn, orange peel, or knockdown, require specific viscosities and drying times to achieve the desired look. Each type of texture may work best with a particular type of joint compound formulation. By understanding the texture effect one wants to achieve, one can select a joint compound that will provide the right consistency and workability for the project. Paying attention to the type of texture desired ensures a successful outcome and a ceiling that meets one’s aesthetic preferences.
Drying Time
Considering the drying time of joint compound is important when selecting the right product for ceiling texture application. A faster drying time is desirable for projects that require efficiency and may need multiple layers applied in a short timeframe. Conversely, slower drying compounds can be beneficial for beginners or larger projects, allowing more time for application and adjustment before drying occurs. Understanding the drying time of joint compound ensures that the product chosen aligns with the specific needs of the project, ultimately leading to a successful and well-executed ceiling texture application.
Ease Of Sanding
Choosing a joint compound with ease of sanding in mind is essential for achieving a smooth and professional finish on ceiling textures. A joint compound that is easy to sand can save time and effort during the finishing stages of a project. It allows for smoother and more even sanding, resulting in a flawless surface ready for painting or further decoration. Struggling with a compound that is difficult to sand can lead to frustration, uneven textures, and the need for more coats, ultimately prolonging the project timeline. Opting for a joint compound known for its easy sanding properties can streamline the process and ensure a high-quality end result.
Coverage Area
Considering the coverage area is crucial when selecting joint compound for ceiling texture because it directly impacts the quantity needed for the project. Understanding the coverage area helps in estimating the total amount of joint compound required, preventing unnecessary waste or shortage during application. By calculating the coverage area accurately, individuals can purchase the right amount of joint compound, saving time and money. This factor ensures efficient planning and execution of the ceiling texturing project, resulting in a smooth and uniform finish without interruptions due to insufficient supplies.
Stain-Blocking Properties
Considering the stain-blocking properties when choosing joint compound for ceiling texture is essential as it can help prevent discoloration and ensure a long-lasting finish. Stains from water damage, smoke, or other sources can easily seep through low-quality joint compounds, leading to unsightly marks on the ceiling. By opting for a joint compound with excellent stain-blocking capabilities, you can maintain the appearance of your textured ceiling for years to come without having to worry about persistent stains ruining the aesthetic appeal. This factor ultimately contributes to the durability and overall quality of the ceiling texture application.
Application Techniques For Ceiling Texture
To achieve professional-looking ceiling texture, proper application techniques are essential. Begin by preparing the surface by removing any debris or loose particles. Next, apply a coat of primer to ensure the joint compound adheres well to the ceiling. For textured ceilings, consider using a thicker-nap roller for better coverage.
When applying the joint compound, work in small sections to maintain control over the texture pattern. Experiment with different application tools such as brushes, trowels, or even sponges to achieve various textures like swirls, stippling, or knockdown. Avoid overworking the compound to prevent inconsistencies in the texture.
For a consistent finish, aim for even pressure and speed while applying the joint compound. Keep in mind that different textures require varying techniques, so practice on a small section before moving on to the entire ceiling. Lastly, allow sufficient drying time between coats to avoid any cracks or bubbles in the texture.
By mastering these application techniques, you can create beautifully textured ceilings that enhance the overall aesthetic of your space. Experiment with different methods and tools to find the perfect texture that complements your interior design style.
Tips For Achieving A Professional Finish
Achieving a professional finish when applying joint compound for ceiling texture requires attention to detail and proper technique. Begin by preparing the surface thoroughly, ensuring it is clean, dry, and free of any debris. Fill in any cracks or holes with the joint compound and allow it to dry completely before proceeding.
When applying the joint compound, use smooth and consistent strokes to create a uniform texture across the ceiling. Work in small sections to maintain control and achieve a seamless finish. Remember to feather the edges of each application to blend the texture seamlessly with the surrounding areas.
To enhance the professional quality of your ceiling texture, consider using specialized tools such as textured paint rollers or brushes to create unique patterns and designs. Experiment with different techniques to find the one that best suits your desired aesthetic. Lastly, allow sufficient time for the joint compound to dry before painting or further finishing to ensure a durable and long-lasting result.
By following these tips and techniques for achieving a professional finish when working with joint compound for ceiling texture, you can create a visually appealing and polished look that enhances the overall aesthetic of your space.
Maintenance And Repair Considerations
Maintenance and repair considerations are crucial when dealing with ceiling texture. Regular maintenance helps prolong the lifespan of the texture and prevents potential issues. Inspecting the ceiling texture periodically allows you to identify any signs of wear and tear, such as cracks or peeling, so you can address them promptly.
When it comes to repairs, using the right joint compound is essential for seamless results. Make sure to choose a high-quality product that matches the existing texture for a cohesive finish. Properly preparing the surface by cleaning and priming it before applying the joint compound will ensure better adhesion and longevity of the repair.
Additionally, following the manufacturer’s instructions for mixing and applying the joint compound is key to achieving professional-looking results. Take your time to feather out the edges of the repair area to blend it seamlessly with the surrounding texture. Sanding and painting the repair area to match the rest of the ceiling will complete the maintenance process and leave your ceiling looking flawless.
By incorporating regular maintenance practices and using the right joint compound for repairs, you can keep your ceiling texture looking its best for years to come. Investing time and effort into maintaining and repairing your ceiling texture will not only enhance its appearance but also help prevent more significant issues down the line.
Frequently Asked Questions
What Is Joint Compound And Why Is It Important For Ceiling Texture?
Joint compound is a versatile material used in drywall finishing to cover joints, seams, and imperfections. It is specifically designed to create a smooth and seamless surface when applied to drywall or plaster. In ceiling texture applications, joint compound is crucial for achieving an even and uniform texture that hides imperfections and adds a decorative finish to the ceiling surface. It helps to create a cohesive look by blending the seams and joints, resulting in a professional and clean appearance for the finished ceiling texture.
How Do I Choose The Best Joint Compound For My Ceiling Texture Project?
When choosing a joint compound for a ceiling texture project, consider the texture you want to achieve and the drying time. Lightweight joint compounds are easier to work with for overhead applications. Look for products labeled specifically for ceilings and textures. Consider ready-mixed options for convenience or powdered compounds for more control over consistency. Additionally, ensure the product is sandable and paintable for a smooth finish. Do a small test patch before committing to a larger area to ensure the desired outcome.
Are There Specific Features To Look For In A Joint Compound For Ceilings?
When choosing a joint compound for ceilings, look for products labeled as lightweight or low-shrinkage to make overhead application easier. These compounds are designed to minimize sagging and reduce the need for multiple layers. Additionally, opt for mold-resistant formulas to prevent the growth of mold and mildew in high-humidity areas like bathrooms or kitchens. These features ensure a smooth application and a lasting finish on ceiling surfaces.
Can Joint Compound Be Used For Both Repairs And New Ceiling Texture Applications?
Yes, joint compound can be used for both repairs and new ceiling texture applications. For repairs, joint compound can be used to fill in holes, cracks, or other imperfections in a ceiling before painting or retexturing. When applying a new texture to a ceiling, joint compound can be used to create various textures such as skip trowel, knockdown, or orange peel. It is versatile and easy to work with for both repairing and creating texture on ceilings.
Are There Any Tips Or Techniques For Applying Joint Compound For Ceiling Texture?
When applying joint compound for ceiling texture, it is important to thin the compound slightly to make it easier to work with and reduce the weight on the ceiling. Utilize a texture sprayer for a more uniform application and quicker process. Work in small sections, applying the compound evenly with a trowel or brush. Experiment with different techniques such as stippling, swirling, or stomping to achieve the desired texture effect. Allow each layer to dry completely before adding additional coats and sanding between layers for a smooth finish. Practice on a small area first to perfect your technique before tackling the entire ceiling.
Final Thoughts
In selecting the best joint compound for ceiling texture, it is essential to prioritize quality, consistency, and ease of application to achieve a flawless finish. By carefully evaluating the products reviewed and considering your specific project requirements, you can confidently choose the best joint compound for ceiling texture that meets your needs. Your decision will directly impact the final appearance and durability of your textured ceilings, making it crucial to invest in a high-quality product that exceeds expectations. Choose wisely and elevate your space with the best joint compound for ceiling texture.